YouTube proxy: What it is and how to set it up
A YouTube proxy is a specialized tool that works as a bridge between the user and YouTube. It redirects user traffic through its own servers, enabling access to videos that might otherwise be blocked in a particular region or country.
Why people use YouTube proxies
There are several key reasons why users turn to YouTube proxies. Each serves a different purpose depending on the user’s goals.
1. Access and speed optimization
Proxies can significantly improve the speed of accessing YouTube in environments where administrators deliberately throttle video platforms. This helps users stream videos without lag or buffering delays.
2. Marketing purposes
For marketing teams, proxies are helpful for content review, ad tracking, and competitor research. They allow marketers to view YouTube content as it appears in other regions, evaluate ad placements, and gather insights to refine their strategies.
3. Circumventing regional restrictions
Certain videos on YouTube are restricted to specific regions due to licensing or legal constraints, often displaying messages like “This video is not available in your country.” Proxies allow users to appear as though they are connecting from a permitted location, unlocking access to restricted content.
4. Overcoming local network bans
Access to YouTube might be blocked on school or workplace networks. Proxies help bypass these restrictions, restoring access even where it's normally prohibited.
5. Privacy and anonymity
Proxies offer extra privacy by concealing the user’s real IP address. This limits tracking by YouTube and third parties, making proxies ideal for users who prefer to keep their viewing habits discreet.
By using a YouTube proxy, users gain greater freedom in accessing content, improved privacy, and expanded video availability. However, it’s vital to use trusted services to minimize potential security issues.
Is Using a YouTube proxy safe?
The safety of using a YouTube proxy largely depends on the service provider and how the proxy is configured. Consider the following:
Benefits of proxies
- Anonymity – Hides your real IP address, protecting against tracking.
- Access to blocked content – Lets you reach content unavailable in your network or region.
Risks to consider
- Service trustworthiness – Not all proxy services are reliable. Some might log your activity or expose you to risks. Always choose reputable providers like Belurk, known for maintaining privacy and security. Belurk ensures your connection remains protected, logs nothing, and minimizes online threats.
- No encryption by default – Unlike VPNs, proxies often don’t encrypt traffic, making data vulnerable, especially on public networks.
- Potential slowdowns – Free or overloaded proxies may cause noticeable slowdowns, affecting video quality.
- Compatibility issues – Not all proxies function smoothly with YouTube, potentially causing errors or connection drops.
How to set up a proxy for YouTube
Windows 10-11 Setup
There are multiple ways to set up a proxy on Windows 10:
Automatic setup
The simplest option allows Windows to detect and apply proxy settings automatically.
How to set up automatically:
- Click Start.
- Open Settings.
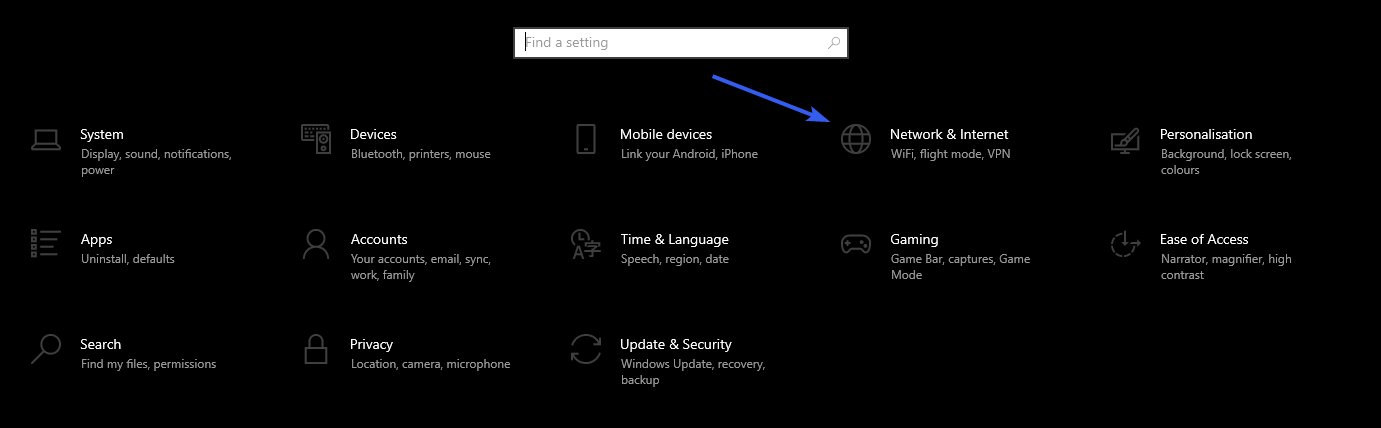
- Go to Network & Internet.
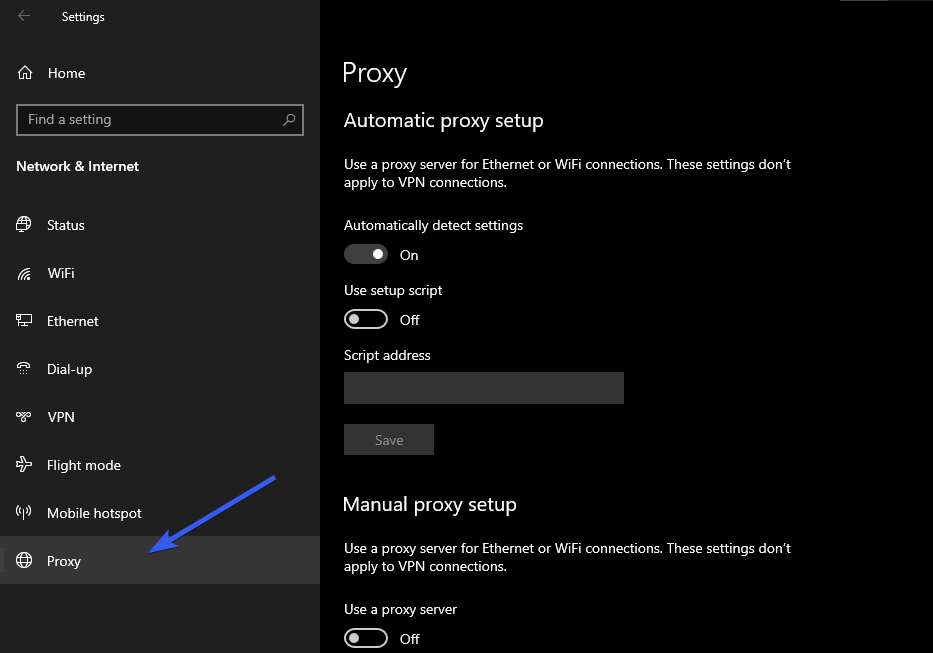
- Find the Proxy section.
- Look for Automatic proxy setup.
- Turn on Automatically detect settings.
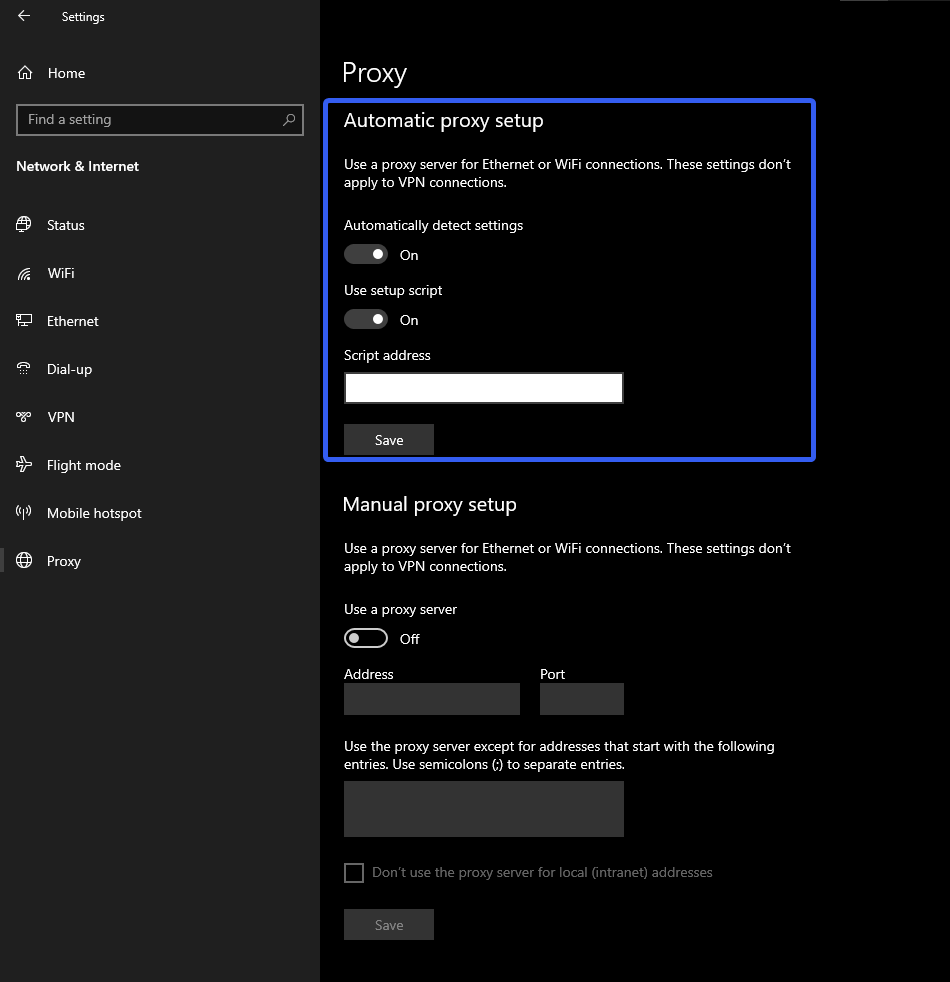
Your PC will configure itself automatically.
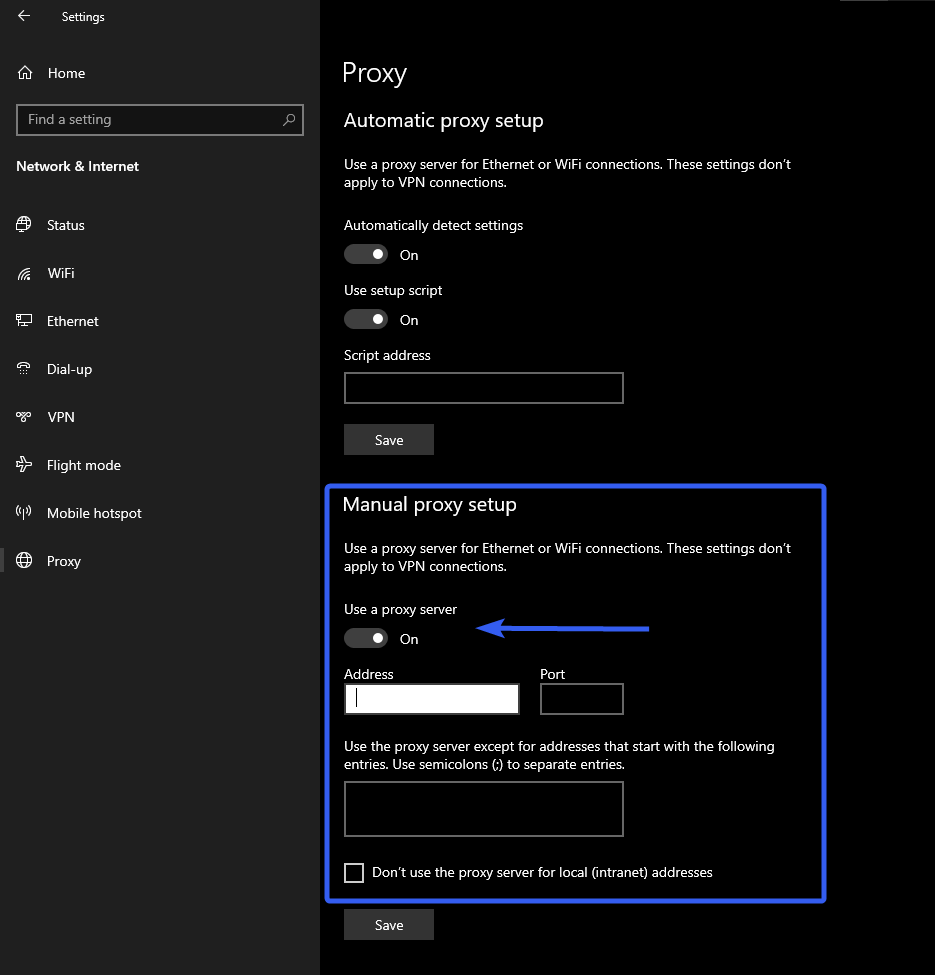
Manual Setup
Alternatively, you can configure the proxy manually by entering the IP address and port.
macOS Setup
Follow these steps to set up a proxy on macOS:
- Download your proxy configuration file after purchase. This file includes the IP, port, username, and password.
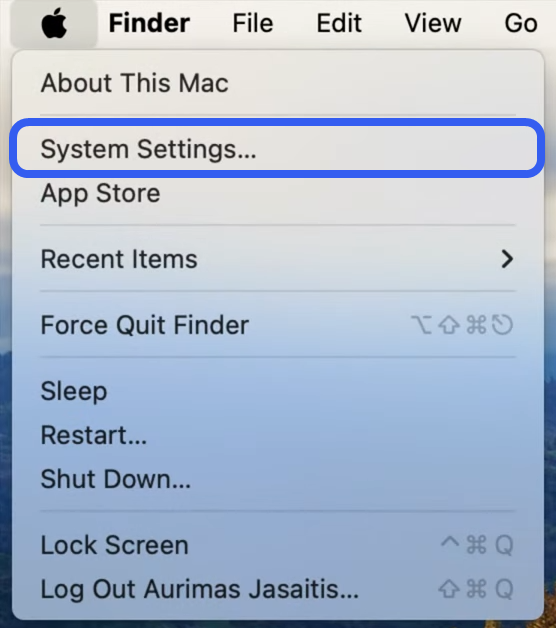
- Open System Settings from the Mac menu.
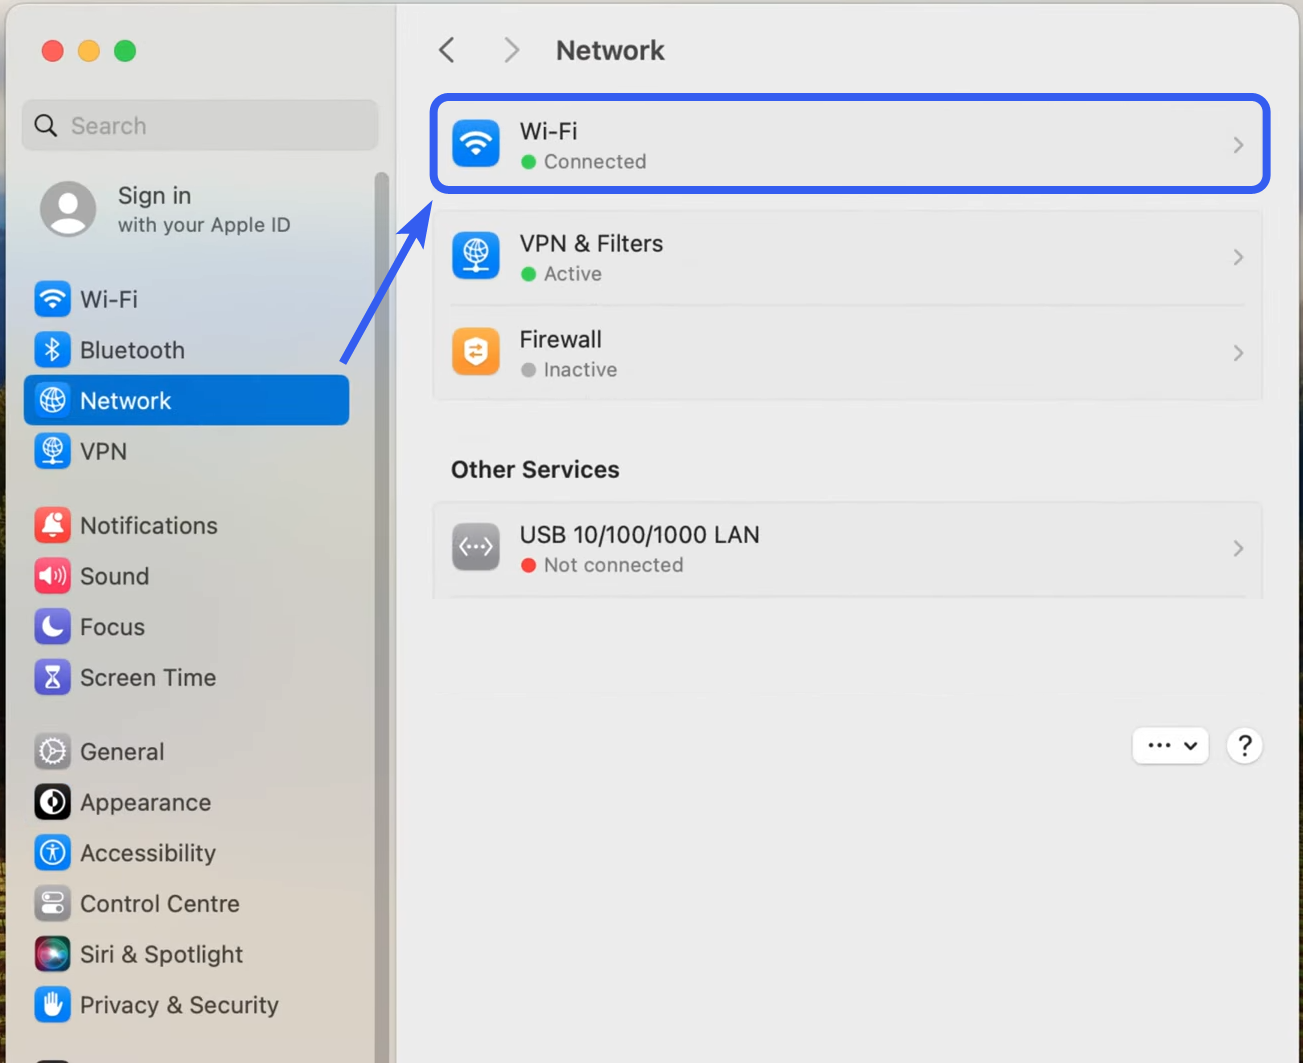
- Click the Network (globe icon).
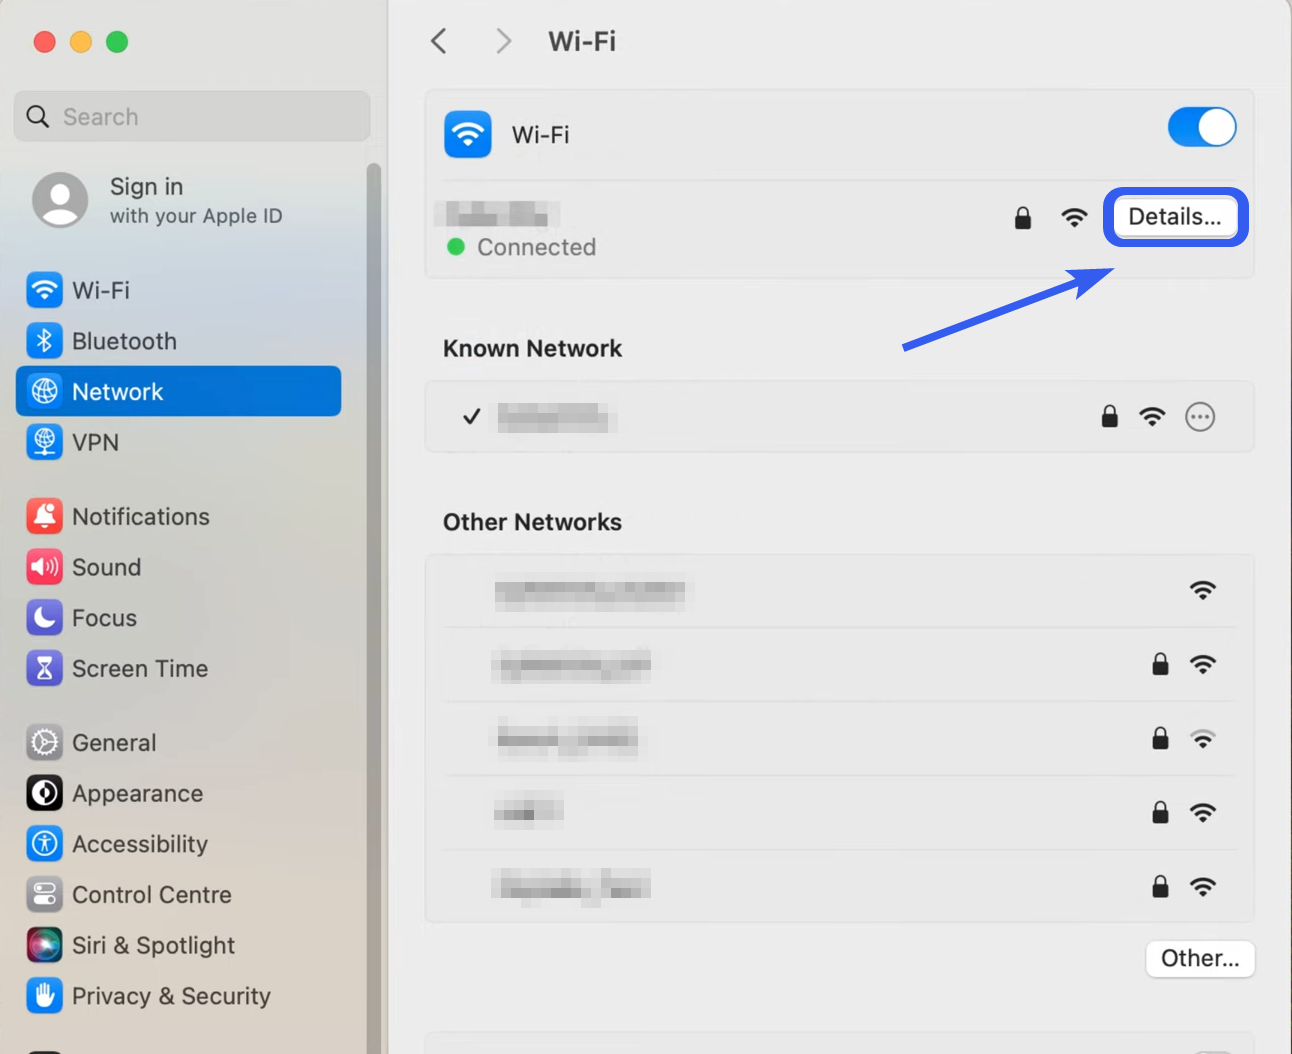
- Choose your connection (Wi-Fi, etc.) and click Details.
- Go to the Proxies tab.
- Select the proxy type (HTTP/HTTPS) and enter your credentials.
- Done! macOS now routes traffic through the proxy.

You can exclude domains from proxy use via “Bypass proxy settings for these Hosts & Domains.” Use wildcards or full domains as needed.
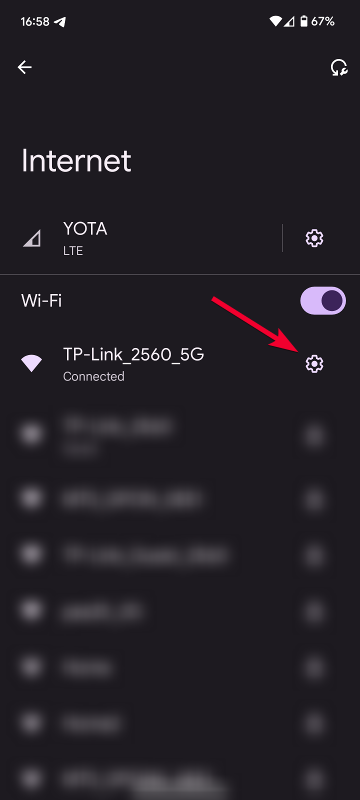
Android setup
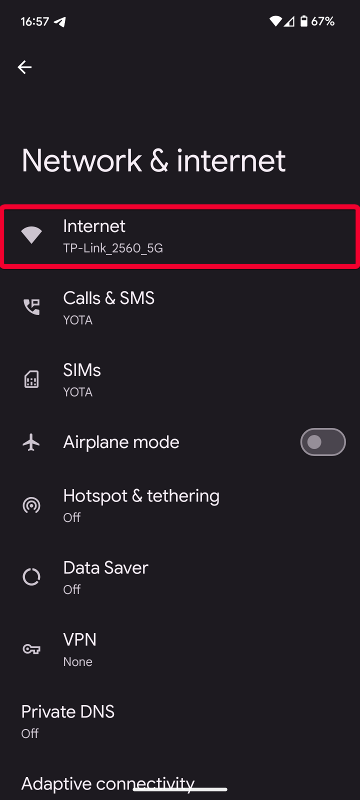
- Open Wi-Fi settings on your device. Select your network.
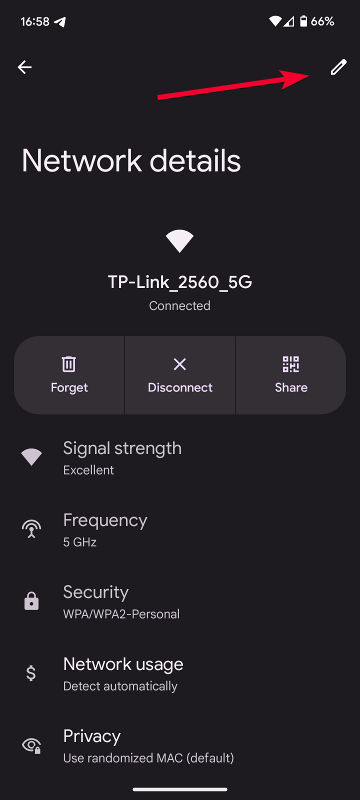
- Access advanced settings.
- Find Proxy and choose Manual.
- Enter your proxy details.
- Save your changes.

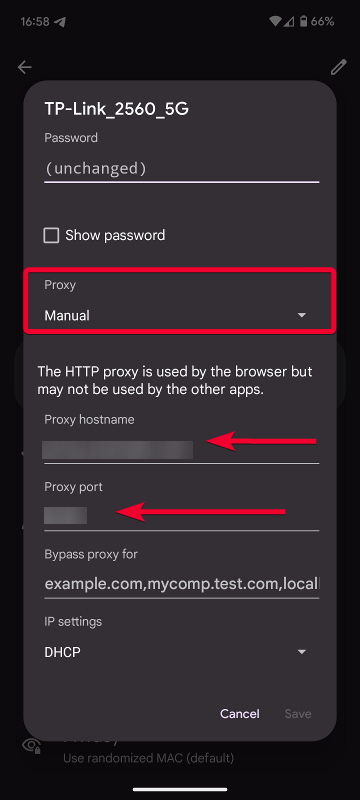
Your Android device now uses the proxy for Wi-Fi connections.
Choosing a reliable proxy service
When selecting a proxy service, consider these factors for optimal security and performance:
- No IP/DNS leaks
Ensure your provider guarantees leak-free connections to maintain anonymity and secure your traffic—essential for bypassing geo-restrictions.
- High-speed stability
Opt for providers with fast, stable speeds—crucial for streaming. Look for low latency and high bandwidth options.
- User feedback
Review ratings and testimonials. Real user experiences reveal a service’s true reliability and highlight potential issues.
- Support quality
Reliable customer support is key. Make sure assistance is accessible and effective. Good support simplifies proxy setup and troubleshooting.
Evaluating these criteria will help you select a secure and efficient proxy service tailored to your needs.
How to verify If your proxy works
Verifying proxy functionality ensures both security and performance. Follow these steps:
- Check IP address
Confirm your IP using Belurk’s IP check tool. This shows if your traffic routes through the proxy.
- Test connection speed
Run a speed test (e.g., Speedtest) to check performance with the proxy enabled.
- Run a DNS leak test
Check for DNS leaks that might expose your location. If leaks appear, review your setup.
- Access restricted content
Attempt to access geo-blocked sites or videos to confirm the proxy bypasses restrictions.
- Monitor stability
Observe connection stability over time—especially important for uninterrupted streaming or long sessions.
Using these checks ensures your proxy performs reliably, keeping your browsing secure and efficient.
cyrilou
-

The impact of technology on business scalability
Businesses must be both fast and adaptable—two essential levers for growth. Technologies like AI, automation, and cloud computing have become indispensable. Failing to adapt means risking serious setbacks compared to the competition. I once worked for a software company that didn’t believe in the cloud—this cost them dearly… We’ll explore how these tools are transforming […]
-

Artificial Intelligence: The next technological revolution after the Internet?
The creation of the Internet at the end of the last century revolutionized our lives (for better or worse, depending on one's perspective…). But it didn't happen overnight; it took decades to profoundly transform our societies after its invention. Artificial intelligence seems to be following a similar trajectory. Often overestimated in the short term—just look […]
-

Essential Python libraries for Data Science
When you're a developer looking to dive into data science, you immediately think of Python ^^ (Okay, maybe I'm a bit biased haha). It’s fair to say that Python remains the undisputed star of the field, with a massive and rich ecosystem!In this article, we’ll take a tour of the must-know Python libraries, organized by […]
Laisser un commentaire